ANI 230 3D Design and Modeling
Summary
ANI 230: 3D Design and Modeling
Winter 2020-2021
Class number: 28271
TuTh 10:10AM - 11:40AM
OLSYN CH000 Online
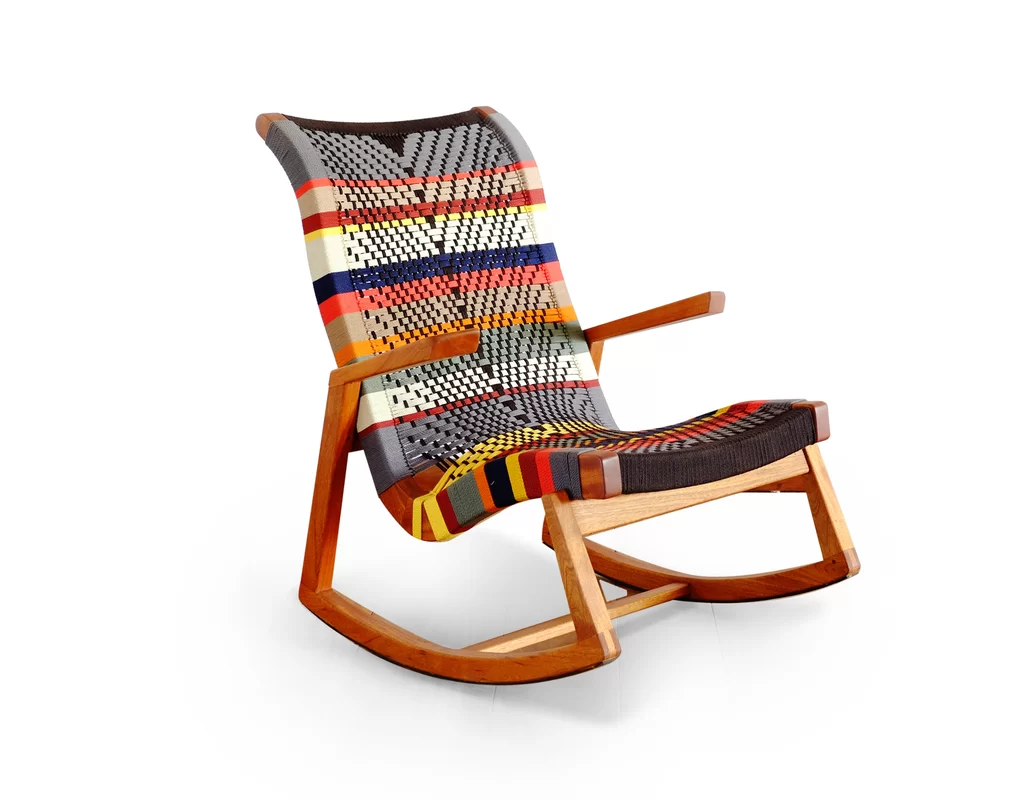
Students will use computer modeling to explore the principles of 3-dimensional design. Projects involving object, character and architectural modeling will emphasize the aesthetic concepts of spatial proportion (scale, angle and position), silhouette, negative space, rhythm, balance, light/shadow and texture. Students will emerge with the ability to create well designed 3D models, and be familiar with the basics of polygonal modeling, texturing, lighting and rendering for animation, computer games and cinema. PREREQUISITE(S): None
Modeling in Maya
Maya Interface 101
alt + LMB =tumble
alt + MMB =track
" + RMB =dolly
hotkeys: f = frame all, z =undo, - =reduce the coordinates, + increase them
4 = wireframe, 5 =smooth shade, 6 =hardware texturing
w =translate tool, e = rotate, r =scale tool
Create-->polygon primatives-->plane
click on text in the channel, MMB drag in the composition workspace, isolate channel value change
imputs: reduce to bare minimum of poly detail
e
-
Bring reference onto an image plane
Maya hotkeys: w-move, e-rotation, r-scale
After creating a polygon object, reduce poly info in the inputs
6--activate hardware rendering
Assigning an arnold shader onto the image plane, loading the file
Shift + RMB --bring up your hotbox
1--wireframe mesh
3--smooth mesh preview
G--repeats last action
Y--repeats last tool
Crease tool--to harden edges without adding typology
Insert edge loop tool
Extrude
Organizing a scene in the Outliner
-
Name everything
-
Group appropriately (ctrl +g)
-
Modify → freeze transformations
-
Delete by type history
-
Set pivot points (d or insert)
Assignment 1: graybox an entire environment using polygon cubes --only use position, rotation, scale and grouping/duplication (cmd +d) to accomplish your task. The goal is to show an impeccable sense of scale and proportion--hint hint--look for duplicatable forms!
Lesson 1: transforming objects--polygon cubes--get the proportions right!
Lesson 2: prop modeling--using components--faces, vertices, edges, always model an object in the way it is manufactured--if there are separate pieces in real life, model separate pieces
GET REFERENCE!!!!! Don’t ever make crap up!
-
Determine the simplest poly primitive to address the reference
-
Reduce the inputs to their simplest, most acceptable form
-
Use hotkey 3 (smooth mesh preview) to determine the quality--how low can you go (polycount wise, not morally)?
-
Still have impeccable sense for proportion and scale (secret to making realistic stuff-demonstrating the relationship between large and small forms)
-
Tweak components--verts, edges, face
-
CREASE TOOL shift + RMB → go to crease tool, MMB drag
-
Most used action (repeat an action “g”) extrusion feature
-
Most used modeling tool (repeat a tool “y”) insert edge loop tool
Materials and Lighting--Rendering Preview
RMB in object mode -->assign new material → arnold aiStandardSurface shader and apply a myriad of presets, create a sweep (background so that the shaders can pick up info/ray tracing)
Add a light, adjust exposure, and color temperature
Assignment 2: Prop Modeling
-
Selectively creasing and aligning edges with scale
-
Sophisticated extrusion insets
-
Using the extrude separate faces feature for adding selective detail to props
-
Extracting and separating faces, remember to edit → delete by type→ history to fully break the components
-
Boolleans
-
union option (great for simulating medical animation/liquid forces)
(parent constrained nurbs curves to objects to get them fuse)
-
Difference
-
intersection
Rule of thumb--add booleans last when the model is near completion and there are strange shapes remaining to add or subtract
-
Modify → convert smooth mesh preview (3) to polygons to selectively add more detail

Assignment 3: Modeling Interiors
Extruding along a curve--cv curve tool--remember the power of history
Re-using the “cube” cylinder and sphere
Building walls and floors with planes
Look for duplicatable assets--consider using instances for easy manipulation of items and processor efficiency
Want to convert an instance back to a duplicate modify-->convert-->instance to object
Modeling interiors continued:
-
Beveling edges
-
2) Using the multicut to eradicate ngons
-
3) creating small details like screws--creasing and aligning with scale tool based off reference
Editing and rebuilding curves, using x to snap to grid for symmetry--using pre-existing assets
NURBS
1)revolve
2)loft
Duplicating along rotation
Assignment 4: modeling exteriors
Add topology to a plane increasing it’s detail
Shift RMB use the sculpt tool, push/pull option and smooth to add complexity to
a topographic map texture to create an environment
Play with paint effects, and using pre-made assets from the content browser (we will learn how to model from scratch but often we use these elements to get started
Create a skyplane--use a lambert shader--plug a ramp shader into the color channel
create the color spectrum based off of observation accord to time of day (ex] sunrise/sunset/afternoon, etc)
Add topology for deformation using a non-linear--bend-deformer
Paint Effects
Using the make paintable feature selecting a ground plane
Going to get brush, choosing an option from the content browser
Manipulating the feature to desired outcome,
Modify, convert paint effects to polygons so that they render out in Arnold
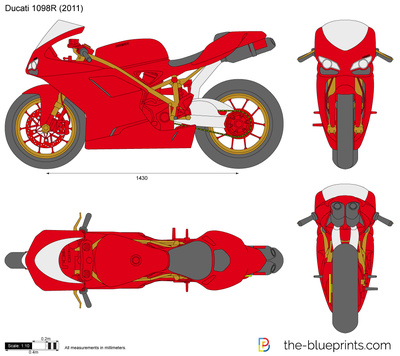
Assignment 5: Complex Hard-Surface Modeling
https://www.the-blueprints.com/blueprints/cars/bmwcars/
Set up your reference in the orthographic views
-
Model modularly--that is how things are manufactured--piece by piece
Start with a smooth cube--made big proportional decisions
Add detail using the insert edge loop tool and the extrusion action
Make sure to name, center pivots, freeze transformations and delete by type history after completion
-
For more complex forms consider extruding edges off of plane, work using (v) to snap points to one another for (polygon sewing). This allows to fabric almost any shape no matter how complex
Consider making it a goal to sell your models on https://www.turbosquid.com/

Assignment 6: Modeling Creatures:
-
Get reference (no orcs! Go for something unusual and challenging--accountability (the z-brush beast doesn’t exist so it can never be wrong) industry pet peeve!
-
Look at skeletal info (become particularly important during rigging)--for quadrupeds watch out for the “high knee” and extended “tarsel bones”
-
Start box modeling--extruding and adding edge loops
-
Watch out for ITC (inner thigh clearance)--make room for crotch and belly
-
Start simply--add edge loops to customize detail
Consider when in a pinch (not for modeling class credit) to go to your content browser to “appropriate creatures” and poly reduce there topology for easy editability
-
Use the sculpt tool, smooth, push/pull to average out vertices for more evenly space topology and to less crimps and crinkles
-
Model the eyes separately from a smoothed cube, model the iris, add secondary film
Assignment 7: Modeling a biped
Assignment 8: Modeling the head and blendshapes
Assignment 9: Lighting/Rendering
-
Give everything some bump to accentuate textural detail (make stuff look real)
-
3 point lighting: key should not be too hot (burn out white), should cast shadows and showcase the main direction of the light
-
Fill (? intensity of the key), opposite on the color wheel, turn off cast shadows
-
Rim (can be duplicated from the fill), placed above and to the side, whiter (purpose: to increase tonal complexity)
-
Add skydome light (import an HDRI (high dynamic range imagery)--give reflections to your specular elements (like chrome)
-
Platform turntable
Assignment 10: Final Project Compilation
Getting Hired 101:
-
Get online--look up websites of studios you want to work for
-
Make work that looks like the stuff they do--get a website together with reel showcasing the exercise we’re doing:
Modeling: graybox AO environment (shows off proportions for pre-pro)
3 props of increasing complexity (drill)
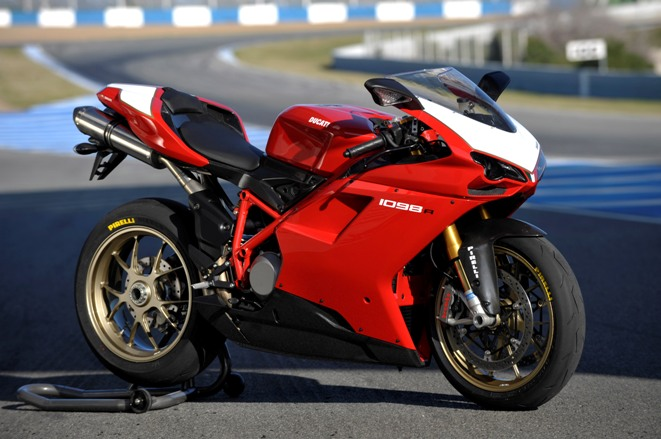
Complex hard surface modeling (motorcycle/car)
Interior (bar)
Exterior (generated paint effects, plants)
Creature
Bipedal humanoid characters
(Show AO/wireframe--maybe texture)
-
Compile all this-- put it on a reel on the website, still image gallery, contact (about you, CV, contact info)
-
Business that directs folks to this website
-
Look up artists at these studios who are doing what you want to do
-
Go to their personal sites, reach out saying:
“Hi Bill, I loved your work on Goro in the new Mortal Kombat 35, I am really interested in being a modeler myself (give a credential George Town), here’s a link to my reel--I wonder if you could give me a few pointers/critique.”
-
Follow them on Linked In
This syllabus is subject to change as necessary during the quarter. If a change occurs, it will be thoroughly addressed during class, posted under Announcements in D2L and sent via email.
Evaluations are a way for students to provide valuable feedback regarding their instructor and the course. Detailed feedback will enable the instructor to continuously tailor teaching methods and course
content to meet the learning goals of the course and the academic needs of the students. They are a requirement of the course and are key to continue to provide you with the highest quality of teaching. The
evaluations are anonymous; the instructor and administration do not track who entered what responses. A program is used to check if the student completed the evaluations, but the evaluation is completely
separate from the student’s identity. Since 100% participation is our goal, students are sent periodic reminders over three weeks. Students do not receive reminders once they complete the evaluation.
Students complete the evaluation online in CampusConnect.
This course will be subject to the university's academic integrity policy. More information can be found at http://academicintegrity.depaul.edu/ If you
have any questions be sure to consult with your professor.
All students are expected to abide by the University's Academic Integrity Policy which prohibits cheating and other misconduct in student coursework. Publicly sharing or posting online any prior or current materials from this course (including exam questions or answers), is considered to be providing unauthorized assistance prohibited by the policy. Both students who share/post and students who access or use such materials are considered to be cheating under the Policy and will be subject to sanctions for violations of Academic Integrity.
All students are required to manage their class schedules each term in accordance with the deadlines for enrolling and withdrawing as indicated in the University Academic Calendar. Information on enrollment, withdrawal, grading and incompletes can be found at http://www.cdm.depaul.edu/Current%20Students/Pages/PoliciesandProcedures.aspx.
Students who feel they may need an accommodation based on the impact of a disability should contact the instructor privately to discuss their specific needs. All discussions will remain confidential.
To ensure that you receive the most appropriate accommodation based on your needs, contact the instructor as early as possible in the quarter (preferably within the first week of class), and make sure that
you have contacted the Center for Students with Disabilities (CSD) at:
Lewis Center 1420, 25 East Jackson Blvd.
Phone number: (312)362-8002
Fax: (312)362-6544
TTY: (773)325.7296